 ?
?
?
?

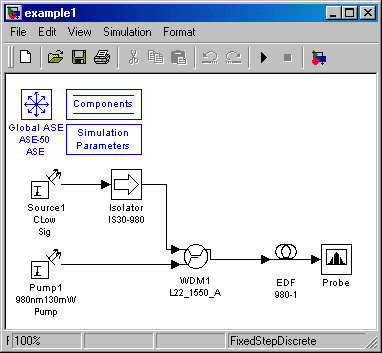
A prominent manufacturer of fiber optic components had an excellent simulator for erbium-doped fiber amplifiers, but it required designs to be expressed in a table of numbers as in Figure 1. In 1999, they asked if we had a better idea. Figure 2 is the same design expressed in our Graphical User Interface (GUI). Even for this very simple example, the graphic design is much easier to generate, read, understand, troubleshoot, and present to others. Imagine the discrepancy for a real amplifier with, perhaps, twenty or more discrete components and with all the splices between them modeled as well!
Want to learn more about the range and quality of graphic ![]() we provided them (and could provide you)? Want to see how we identify and solve problems your team has missed? Read on.
we provided them (and could provide you)? Want to see how we identify and solve problems your team has missed? Read on.
The initial specification called for the generation of the connection matrix (like Figure 1, above) and a table of the initial power at every connection point (or, in their notation, "edge") for every wavelength of interest. The amplifier designer was to prepare the graphic by copying icons from a palette onto the design sheet and "wiring" them together with a computer mouse. It was critical that the tool function properly with closed loops (where the output of one component feeds back to a path that eventually becomes an input to the original component). Their first question was, "Is it possible?"
As this site shows, we do a lot of work with Nation Instruments' LabVIEW® graphical programming language. That environment natively provides icon palettes and the ability to wire them together—The bulk of the task was already done for us. In just 23 hours of work, we went from ground zero to the functional demonstration system that produced the diagram of Figure 3:
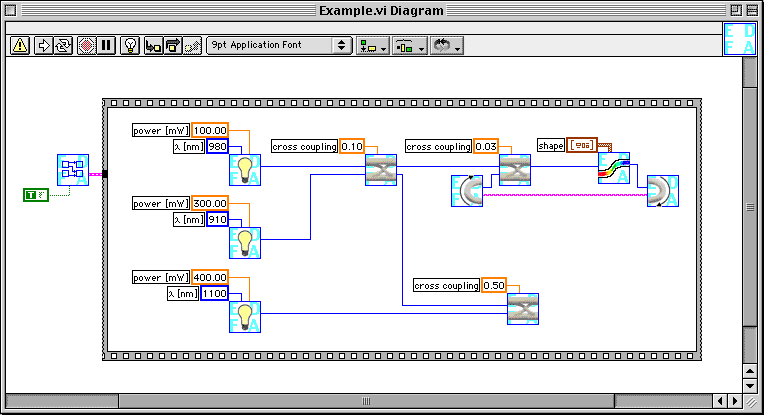
The prototype quickly demonstrated that the job could be done (at least by us), but it had disadvantages. The license for the development environment would be about $1k per seat, for far more power than the client needed. More importantly, LabVIEW version 4.0 did not allow closed loops. The example in Figure 2 does include a functioning closed loop, but it requires the designer to manually add two non-physical components (the elbow macaroni in the diagram). (LabVIEW 7 automatically adds a feedback component if necessary, but version 7 did not become available until 2003.)
A search of the internet turned up more than a dozen reasonable candidate software packages that would supply the ability to make a drawing of the appropriate type. Many of the packages were from universities and were inappropriate for this application because of the lack of a reasonably guaranteed support structure. (Supporting this conclusion, three of the sites we found disappeared during the course of the search.) Some well-known commercial packages (e.g., Photoshop® and CorelDRAW™) were eliminated because they did not understand and maintain connectivity between icons. Our final recommendation was to use LabVIEW for the development phase and to migrate to Visio, if necessary, for any large-scale roll-out of the product or if the feedback loop work around was too cumbersome in actual practice. The client was more concerned than we about the work around, so we started exploring Visio in more depth.
Far down in our list was the Simulink® package from the MathWorks. It was expensive itself, required an even more expensive license for the MATLAB® language in order to operate, supported only wireframe icons, was geared to time-based simulations (of which there were none in the project), and was a language with which we were completely unfamiliar. Of course, Simulink was the client's choice, in major part because the simulation kernel (we discovered later) was written in MATLAB.
I embarked on a crash study of this new language and within 101 charged hours and a single calendar month had a Simulink demonstration that:
As the program progressed, there were isolated instances where Simulink made things a little easier than they would have been with any of the other graphical front ends that we had considered. There were times when I felt that Simulink was not such a bad choice after all.
At the end of 2002 the simulations were extended (by the client) to include time dependent effects in the optical amplifier. This was accomplished using Simulink's built-in ability to handle time simulations. Finally, three years after the start of the program, Simulink was used as Simulink, rather than as simply a convenient drawing tool. The client's initial decision was vindicated.
Returning to the initial stages of the project, the learning process continued and before the end of the second month of working with Simulink, I had to ask for a higher level of support on my calls to the MathWorks help desk—another example of outperforming the second string.
The clarity of the graphic diagrams made it apparent that the amplifier simulation kernel was not operating properly. When the client did not have the requisite resources immediately available to debug these problems, I branched into debugging the kernel code in MATLAB. By migrating the code toward the object-oriented paradigms of data encapsulation, process decoupling, etc., I was able to identify and correct a number of problems. Again, even though MATLAB was a new language for me, I was outperforming their programmer of long experience.
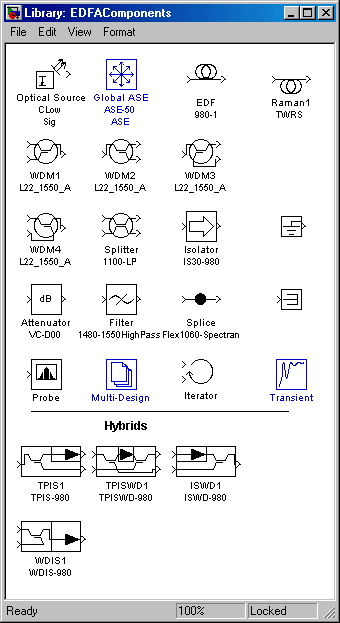
As the client had requested, all the pertinent component types are available from the palette shown in Figure 4. (Learn more.)
Double clicking on the icon of any component on the diagram (Figure 2) brings up a front panel appropriate for that component, such as the Optical Source panel shown in Figure 5, that allows the choice of catalog parts, user generated parts, or tweaking of individual parameters. (Learn more.)
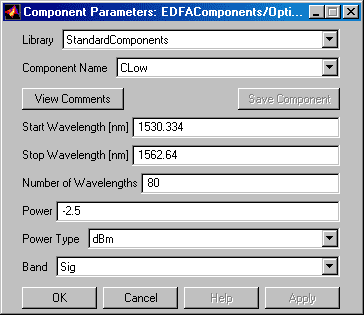
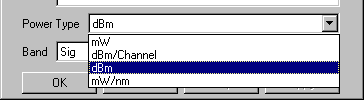
Some controls, such as the optical source wavelengths here, accept arbitrary numerical values. Controls that accept only discrete entries are set from a pop-ups such as Figure 6.
By appropriately partitioning the design, ![]() was able to develop a rapid prototype, extend that to a new computer language chosen by the client, learn another new language to debug the client's portion of the project, and deliver a demonstrably extensible system that exceeded the original specifications. Perhaps most significantly, we received a call from the client saying that he was surprised and delighted when he first had to add features to portions of the kernel that we had modified.
was able to develop a rapid prototype, extend that to a new computer language chosen by the client, learn another new language to debug the client's portion of the project, and deliver a demonstrably extensible system that exceeded the original specifications. Perhaps most significantly, we received a call from the client saying that he was surprised and delighted when he first had to add features to portions of the kernel that we had modified.
Isn't that the type of performance you could use?